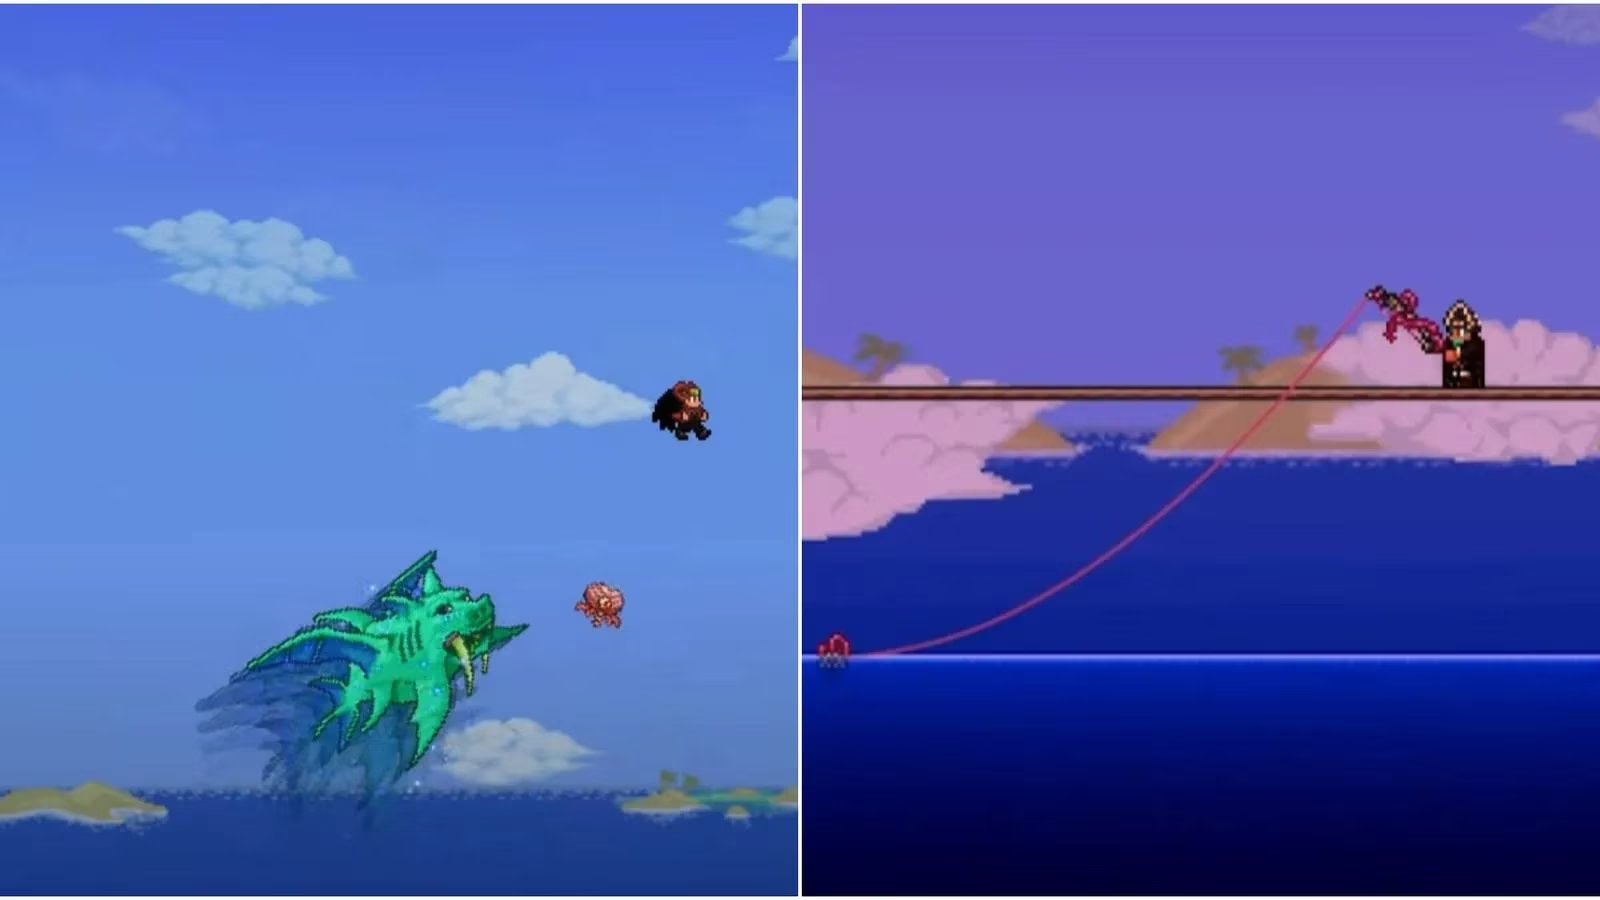
In the vast, ever-evolving world of Terraria, few challenges test a player's mettle like facing down the formidable bosses scattered across its biomes. While 2026 has seen numerous updates and quality-of-life improvements, the core thrill of preparation and combat remains a cornerstone of the experience. Among these legendary foes, Duke Fishron stands out as a particularly demanding Hardmode encounter, a true trial by fire (or perhaps, by water and shark) that separates the casual adventurer from the dedicated warrior. Defeating this aquatic tyrant is no small feat, but the rewards are as bountiful as the ocean is deep, offering unique gear that can redefine a player's journey. This guide will walk you through everything you need to know to summon, battle, and ultimately triumph over the porcine terror of the seas.
🎣 How to Summon the Duke: The Truffle Worm Hunt
First things first, you can't just call up the Duke for a chat. Summoning this boss is a ritual in itself, requiring specific conditions and a very rare bait. Your world must be in Hardmode. Once that's set, the real hunt begins for the elusive Truffle Worm. This critter isn't your average earthworm; oh no, it's a fancy fungal fellow that only spawns in one place: the Underground Glowing Mushroom biome. You'll need to grab your trusty Bug Net (or its fancy Lavaproof or Golden cousins) and go critter-catching. It's a bit like fishing for a very fast, very rare butterfly in a neon cave.

Once you've snagged that wriggling prize, the next step is... more fishing! Head to either ocean biome, cast your line using the Truffle Worm as bait, and get ready. The moment you reel it in, the water will churn, and Duke Fishron will erupt onto the scene, ready for a fight. The cool part? You can attempt this challenge whenever you feel ready in Hardmode; you don't need to beat any other boss first. It's a nice, self-contained challenge, if you're brave enough.
⚔️ Gearing Up for the Fight
You don't walk into a dragon's den in your pajamas, and you certainly don't face the Duke without proper preparation. While various gear setups can work, some choices make the chaotic aerial battle much more manageable.
-
Weapon of Choice: Ranged weapons are your best friend here. Duke Fishron is fast, furious, and spends most of his time zipping through the air. Guns, in particular, are fantastic for keeping your distance while popping his dangerous projectiles. They let you deal consistent damage without having to get uncomfortably close to those gnashing teeth.
-
Essential Mobility: This is non-negotiable. A good pair of Wings is arguably more important than your weapon. They allow you to match the Duke's altitude, dodge his lightning-fast charges, and navigate the battlefield with the agility needed to survive. Without them, you're basically a sitting duck—or perhaps a floating, very vulnerable target.
-
Battlefield Prep: A little construction goes a long way. Before summoning him, consider building a long platform of Wood Platforms above the ocean. This gives you solid ground to run on, helps with maneuvering, and provides a crucial space to avoid his aquatic attacks. Think of it as building your own coliseum for this gladiatorial match.
🐖 The Three-Stage Onslaught: Strategy Breakdown
Duke Fishron's battle is a marathon, not a sprint, with his behavior changing dramatically as you whittle down his health. Here's what to expect in each grueling phase.
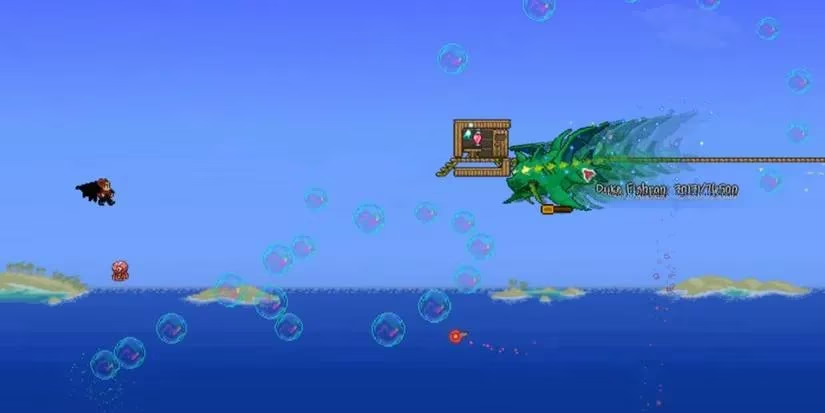
Stage One: Bubble and Sharkron Barrage
The fight kicks off with Duke Fishron employing two main attacks while relentlessly charging at you. He's got a need for speed, that's for sure.
-
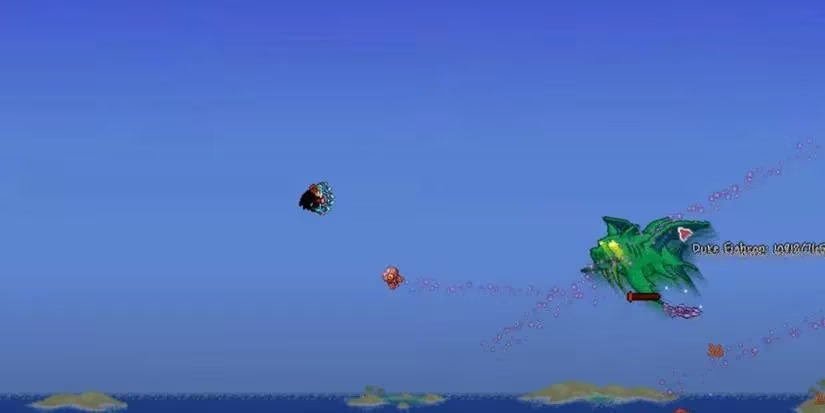
Bubble Blast: The Duke will position himself at the edge of the screen and fire a spread of about 15 homing bubbles. These pink orbs will chase you doggedly. The trick is to pop them with your ranged weapon before they get too close. Letting them hit you is a quick way to lose a chunk of health.
-
Sharknado (Literally): He'll release blobs of water that transform into deadly tornadoes. Each tornado then fires homing Sharkrons. You can shoot the Sharkrons down, or let them crash into blocks to be destroyed. Managing these while dodging the Duke himself is the core challenge of this phase.
Throughout all this, the Duke will be making beeline charges directly at you. Each pass is a risky opportunity—dodge at the last second, then turn and get a few shots in as he flies by. It's a chaotic dance of attack and evasion.
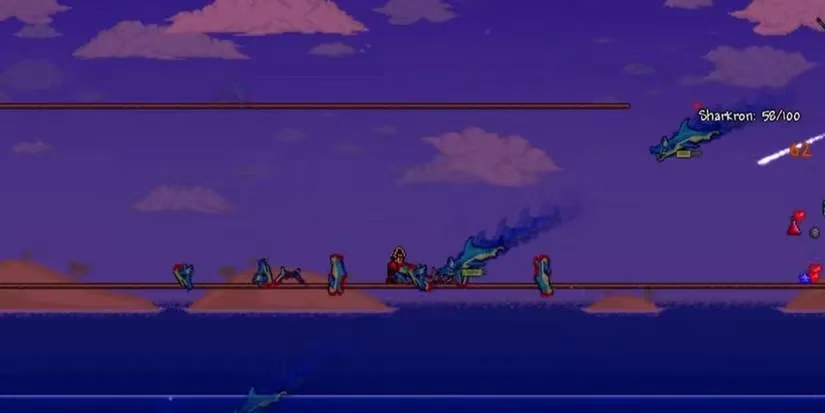
Stage Two: The Ramp-Up
When you drop his health below 50%, the Duke gets serious. In Classic Mode, this is his final form. He transforms, gaining a boost to his stats: more health, significantly more damage, and oh boy, is he faster. His attacks remain the same—bubbles and Sharkrons—but they come out faster, in greater numbers, and the tornadoes are larger. Your platform and wings become absolutely vital for survival here. The margin for error shrinks; every dodge must be precise. It's a real white-knuckle phase where one mistake can send you back to the spawn point.
Stage Three: The Invisible Charge (Expert/Master Only)
If you're playing on Expert or Master Mode, the battle has one more cruel twist. When the Duke's health falls below 15%, he enters a third stage. He turns invisible, shrouding the battlefield in a thick fog. But don't panic! You can still see his glowing red eyes. His entire attack pattern changes: he abandons projectiles for a series of lightning-fast, telegraphed charges.
He follows a predictable pattern:
-
Charge once, then teleport behind you.
-
Charge twice, then teleport again.
-
Charge three times, then the pattern repeats.
The good news? His defense plummets in this stage. He's a glass cannon—if you can hit him. The key is to strike him right before he teleports and use your wings to hover and dodge the charges. It's a tense game of prediction and reaction, but a few solid hits will finally bring the beast down.
💎 The Spoils of Victory: Loot Tables
Ah, the best part. Defeating Duke Fishron showers you with some of the most unique and powerful items in Terraria. The loot varies depending on the game mode you're playing. Here’s a breakdown of what you can earn:
All Modes Guarantee: A pile of coins (scaling with mode) and 5-15 Greater Healing Potions.
| Classic Mode Exclusive Drops | Drop Chance |
|---|---|
| Duke Fishron Mask | 14.2% |
| Duke Fishron Trophy | 10% |
| Fishron Wings 🐟 | 6.6% |
Weapon Drops (20% chance each in all modes):
-
Tsunami: A powerful bow that fires five arrows at once.
-
Tempest Staff: Summons a deadly Sharknado minion.
-
Bubble Gun: A magic weapon that fires a rapid stream of bubbles.
-
Flairon: A unique flail that releases homing bubbles.
-
Razorblade Typhoon: A magical homing projectile that bounces between enemies.
Expert Mode Bonus: You'll receive a Duke Fishron Treasure Bag, which contains all the above weapons, the mask, wings, and the fantastic Shrimpy Truffle mount—a flying, infinite-flight mount perfect for exploration.
Master Mode Prizes: On top of the Expert loot, you have a chance to earn the Duke Fishron Relic (a furniture trophy) and the Pork of the Sea, a cute but mighty pet summon.
Conquering Duke Fishron is a rite of passage in Terraria. It demands preparation, skill, and a cool head under pressure. But the moment he finally falls, and that glorious loot spills out, makes every tense dodge and frantic potion sip worth it. He’s not just a boss; he’s a benchmark. So gear up, craft those platforms, and show the Duke who truly rules the waves. Good luck, adventurer—you're gonna need it.